A display leaves the factory in parts, in a box or on a pallet, and it isn't finished until someone has it upright in the store, loaded and in place. That last step is nearly always done by someone who has never seen it before and has plenty of other things to do. If a shelf ends up loose or the header leans, the brand will see it like that in store for months.
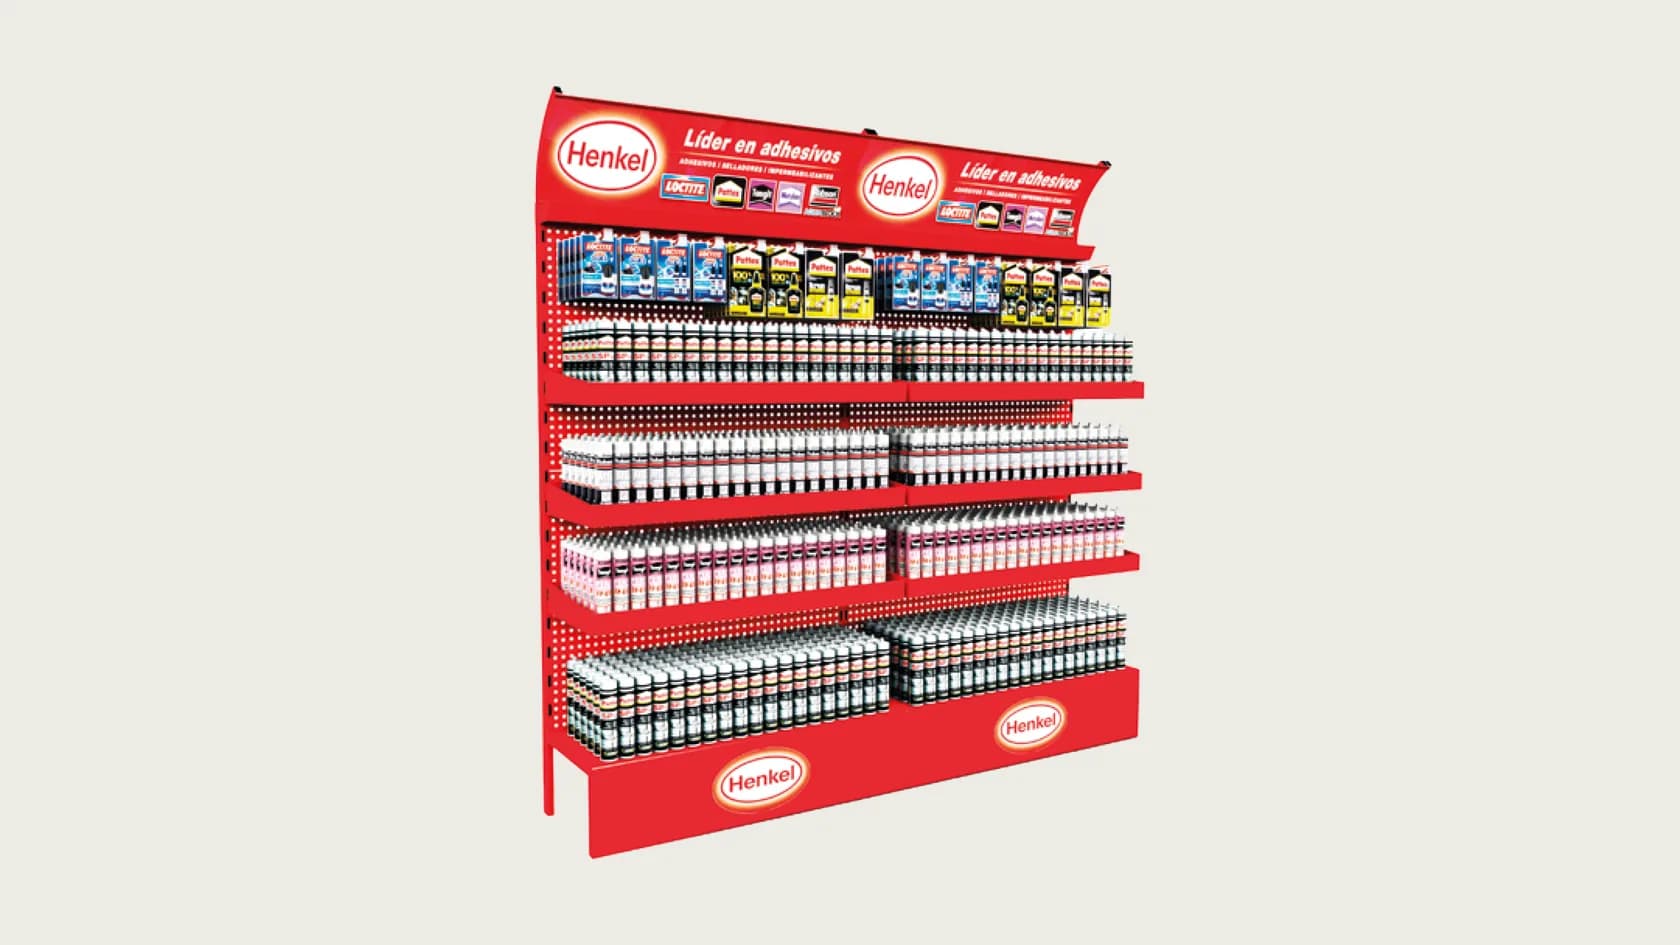
That's why POP display assembly is decided long before the box arrives, in the brief and in the design. Who will assemble it, with what, how much time they have and what has to travel already built are questions that change the piece. We'll go through them with displays we have made for BAXI, Pattex, Arcos and other brands.
We're mostly talking about permanent displays here, which have more parts and sometimes carry heavy product. If yours is cardboard, the comparison between self-assembly and pre-assembled is in our post on the self-assembling cardboard display.
Who handles POP display assembly in store
There are three usual answers, and each one calls for a different display.
Store staff. This is the most common case when a campaign goes out to many stores. They get the box somewhere between restocking and serving customers, and put the display together when they can. For them it has to go up in a few minutes, with no tools and no doubt about what goes where.
The brand's own team. Some brands have merchandisers or sales reps who visit stores and set up the POS material. They know the product and the planogram, but they assemble a lot of displays in a lot of different stores, so a simple piece helps them too.
An installer. When the display is large, very heavy or going to a handful of key stores, the safest option is to have it set up by someone who does this for a living. In-store installation is a service we offer and have carried out on other projects.
There's a fourth option, where the display leaves the factory fully built and the store has nothing to assemble. For a large unit that rarely pays off, because you pay for its volume on every pallet and in every warehouse.
How much assembly to leave for the store
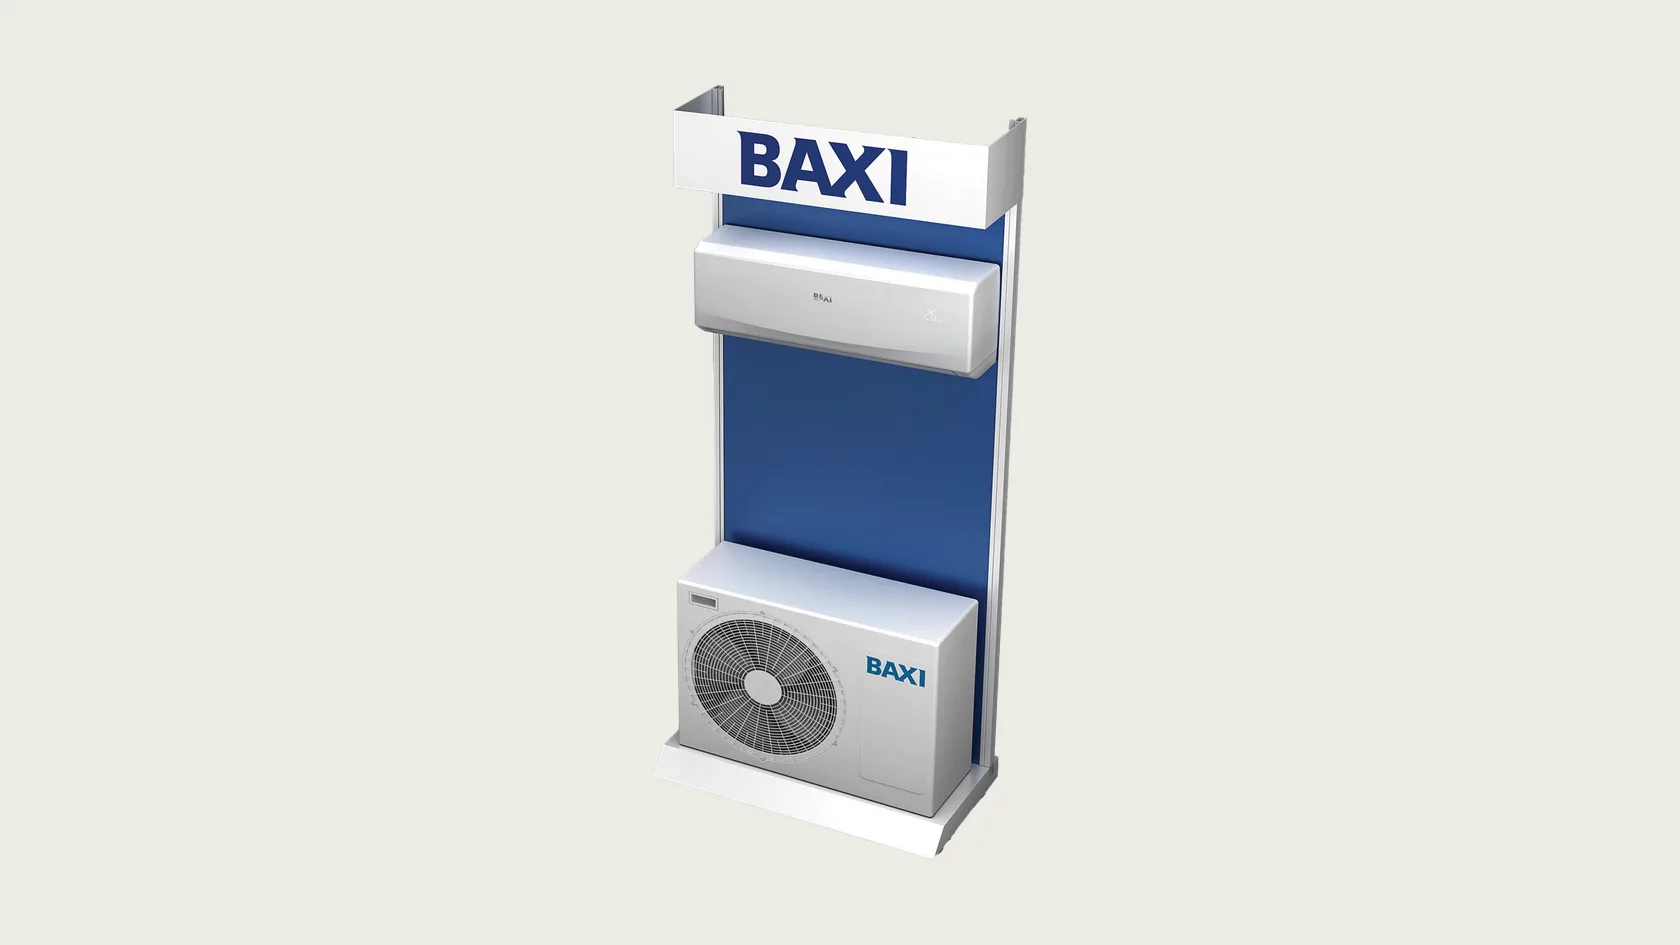
BAXI uses floor displays to show real boilers and air conditioning units, hung at eye level, like the one on the cover. That's heavy product, and whatever holds it up can't depend on how hard someone in a hurry tightens a screw.
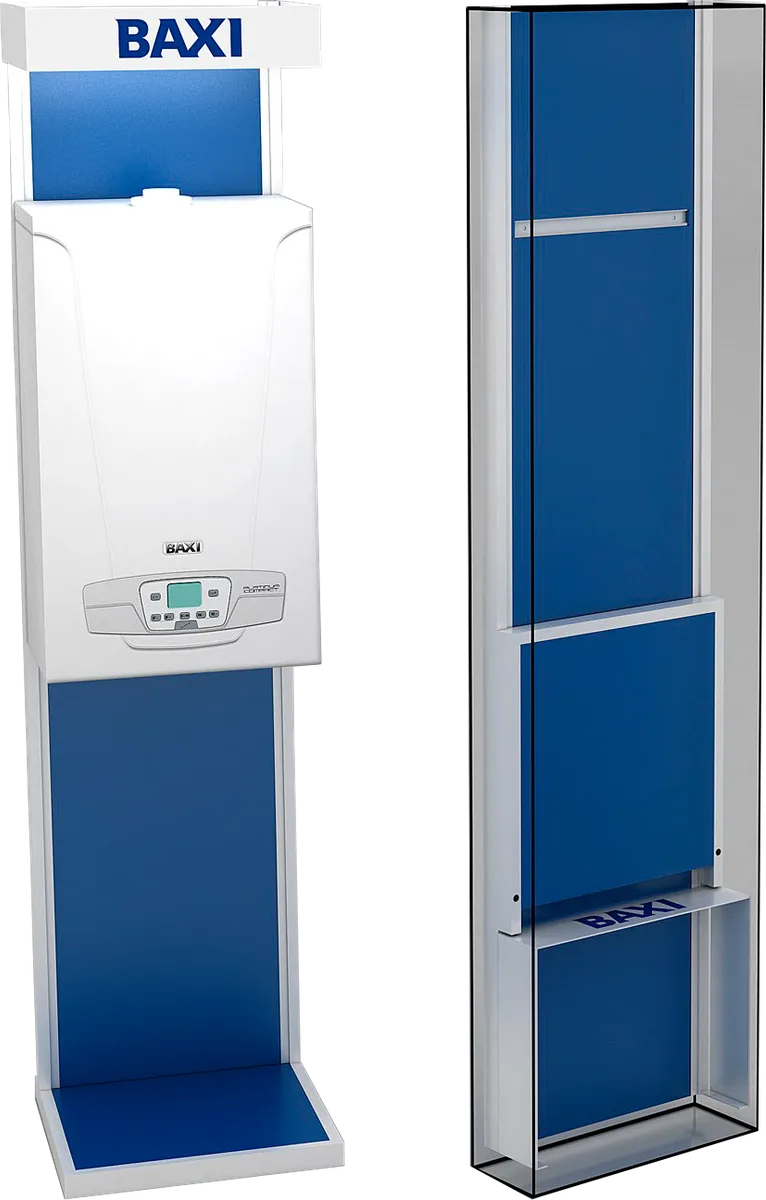
The structure travels folded onto itself, with the blue panels tucked inside the column, in a narrow box. At the destination it unfolds instead of being built piece by piece, so there are few steps left for the store.
When we design a display, we decide which joints leave the factory already made and which are done in store. The load-bearing ones are best left done, and the store gets the steps that leave no room for error. The fewer joints made on site, the less the result depends on whoever is putting it together.
Tool-free assembly
With a board display, the easiest thing for the store is not needing so much as a screwdriver. An MDF display can travel flat and go together without screws, with parts that slot into each other through tabs and slots.
The Pattex Power Tape Extreme display, with French graphics, arrives with all its parts stacked in a flat box. Once assembled, the three trays pass through slots in the side panels and, as they lock in, tie the structure together. It holds up without a single fitting.
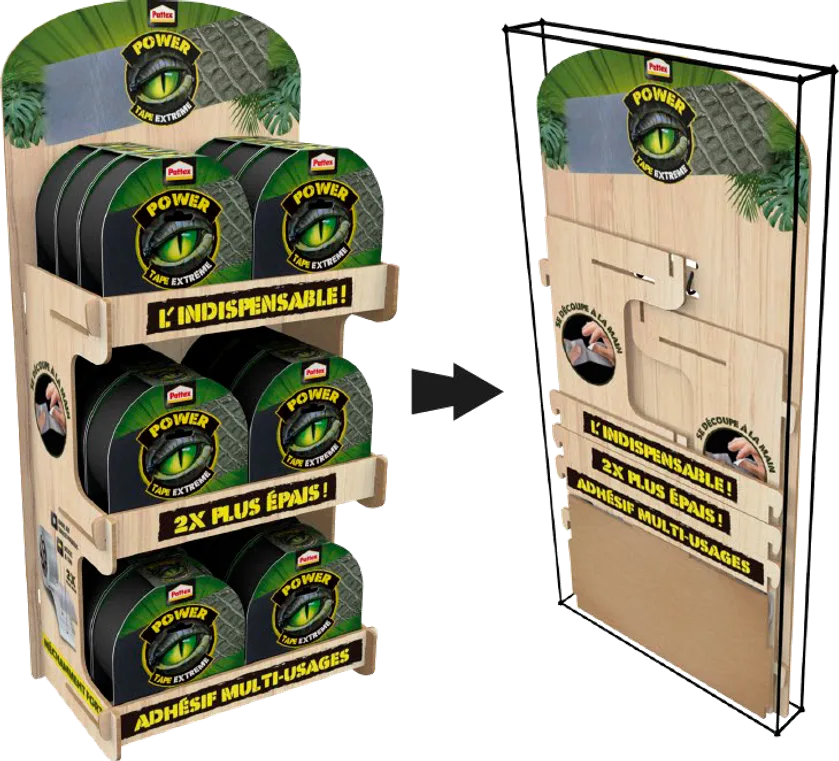
For that to work in anyone's hands, the design has to rule out mistakes. Each part should fit in one place and one way round only, and the fewer loose parts, the better. A part that can go in upside down will end up upside down in some store.
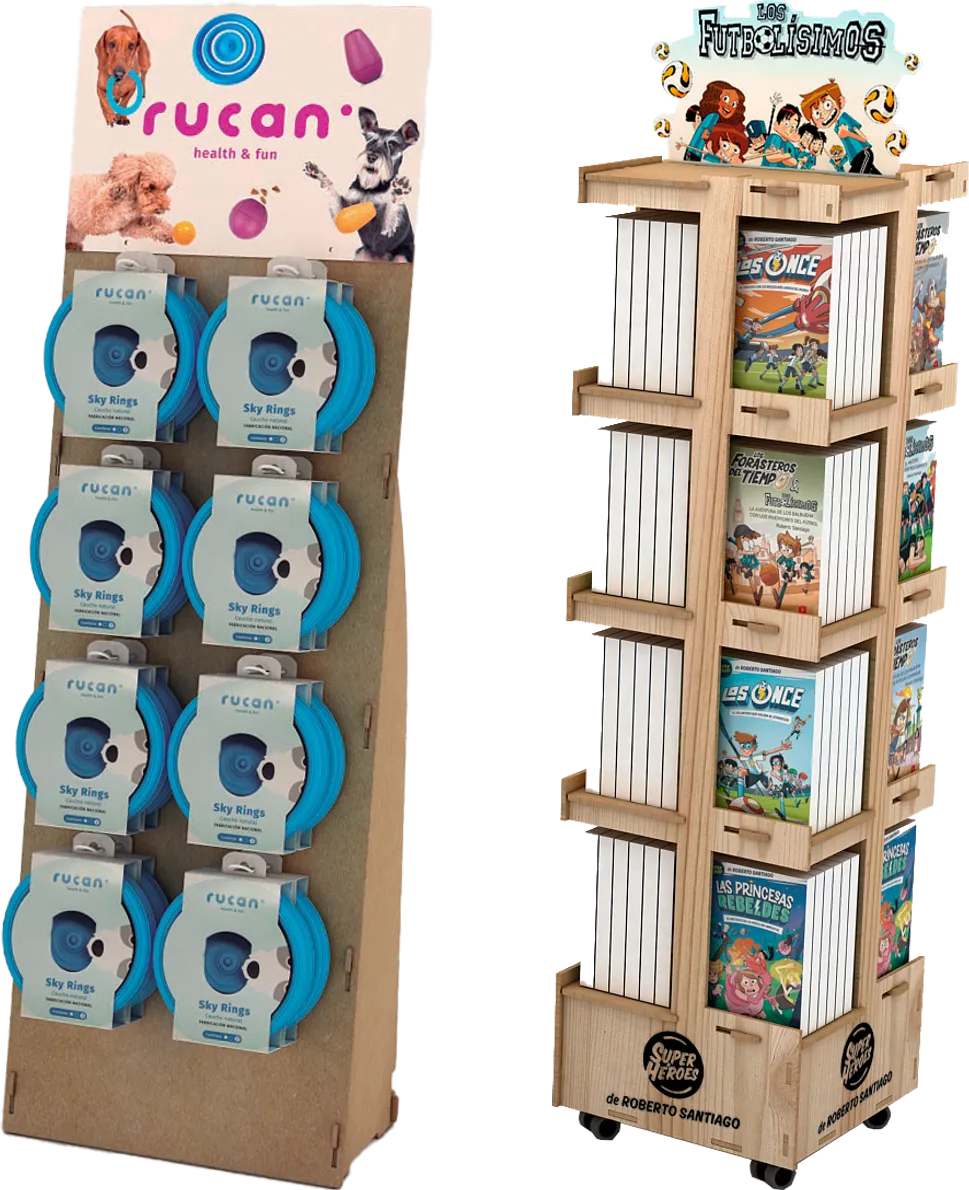
On other displays the joints stay on show and become part of the look. On the Rucan display, for dog toys hung on hooks, the tabs poke out through the sides of the panel. On the Los Futbolísimos book tower, which sits on castors and carries books on all four faces, uprights and shelves cross with their joints in plain sight. Neither needs tools.
When the display is assembled far away
The Arcos cutlery floor display holds blister packs on black perforated panels, inside a structure with the logo on the header and the base. For shipping, the structure parts form a flat tray and the panels are stacked on top.
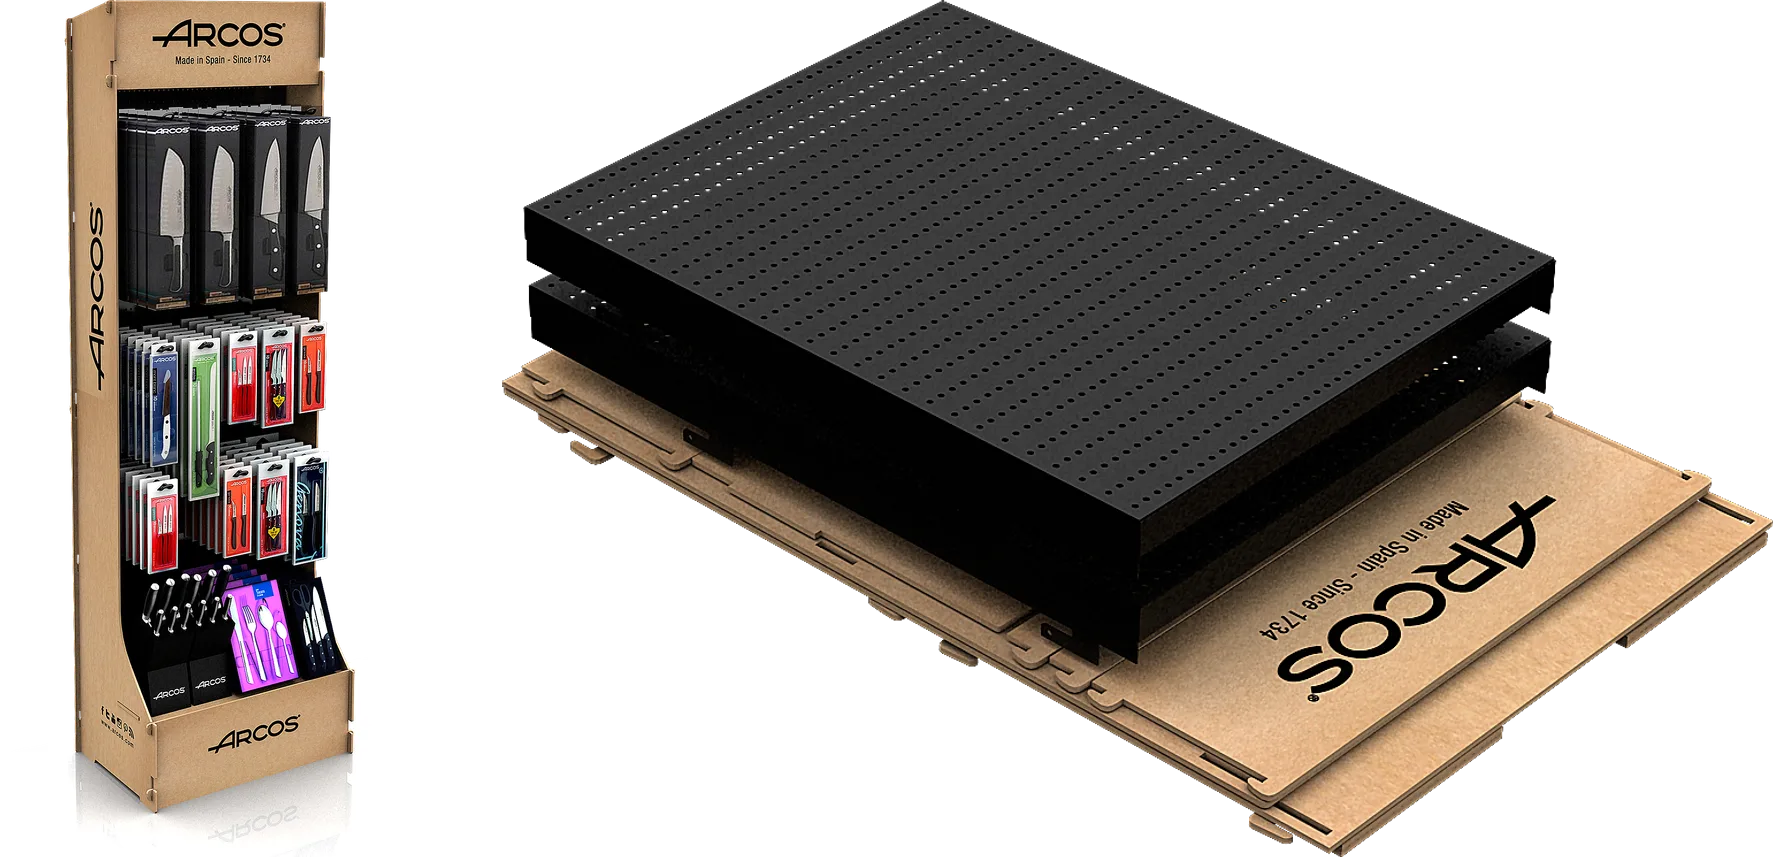
This display travels to other countries. We ship from Barcelona to anywhere in the world, and at the other end it's put together by someone who may not read Spanish or English and has no one to ask if they get stuck. We covered what a flat kit saves on transport in the self-assembling display post. For assembly, it means everything has to make sense without words.
Assembly instructions
For displays that are assembled at destination, we prepare an assembly instruction sheet. It's a single A4 page that goes inside the box, designed to be understood without reading. It includes:
- the parts list, with each part marked with a letter and its quantity,
- numbered steps, with arrows showing how each part moves,
- close-ups of the details people get wrong, such as a tab or a slot,
- the finished display at the end, to check the result.
The sheet is drawn from photos of the actual assembly. If a step is hard to explain when the prototype goes together, it's nearly always better to change the part than to make the sheet longer.
The prototype, which takes about two weeks, is there for that too. Before shipping we check that the display holds the weight of the product and is easy and comfortable to use, and the packaging is designed so it arrives in one piece.
What to settle in the brief
These questions are worth answering before anything is drawn:
- Who assembles it and how much time they have. A shelf stacker with five minutes and an installer with the afternoon booked need different pieces.
- Whether it travels empty or loaded. A display that's filled before it ships is designed to arrive assembled.
- How heavy the product is. With heavy product, like a boiler, the load-bearing joints leave the factory already made.
- How many stores and which countries. The more countries, the more a sheet that works without text matters.
- The maximum pallet height. It decides how many parts the structure is split into and how they're stacked in the box.
- Whether the graphics will change. On a permanent display, every campaign change is another assembly job. If the graphic panels can be swapped without taking the structure apart, the store can do it alone. More on this in our post on permanent POS displays.
A permanent display is made in 45 to 60 days from approval of the artwork and the prototype, as we explain in our post on lead times. Deciding on assembly in the brief saves having to redo the structure after the prototype. If it's a floor unit, how to choose a floor display goes through the formats, and our MDF displays page has more pieces that travel flat and go together without tools.
Frequently asked questions
Who assembles the display in store? It depends on the campaign. It can be store staff, the brand's merchandising team or an installer. We decide it in the brief, because it changes the design of the piece and the instruction sheet.
Do you need tools to assemble a permanent display? Often not. An MDF display can travel flat and go together without screws, with parts that slot together. When a display carries a lot of weight, we try to have the joints that hold it up leave the factory already made, so there's as little as possible to do in store.
Can you set the displays up in the stores? Yes. We offer in-store installation and have done it on other projects. That way the display can still travel flat even if no one in the store has time to put it together.
What language are the assembly instructions in? The sheet uses drawings, letters and numbers so it can be understood without reading, which means it works in any country. If it carries any written notes, they go in whatever language you need.
What is the minimum order for a permanent display? 100 units per reference for floor displays and 250 for countertop displays.
Rolling out a display to lots of stores?
Tell us how many stores it's going to, who'll be assembling it and what product it holds, and we'll design it to go together right the first time, whoever does it.
Post written by the Euromon PLV marketing and production team. For questions about a specific project, contact our sales department at euromonplv.com.